NDTSupport.com - Tech Room - Calibrations

calibrations

Calibrations
last updated: 6/08


NDT Equipment Calibration

Equipment calibrations are required in accordance with AS9100/AC7004 quality system requirements on production equipment, tools and programs or any other such device that is needed to provide evidence of conformity of a product or service to specified requirements. These specified requirements are usually flowed down by customer specifications or standards that are required to be met in the production of a product or service.

Equipment must be calibrated or validated prior to use, maintained and inspected periodically according to documented procedures.  Whether your equipment is calibrated / validated by an outside source or internally, a register of these monitoring and measuring devices shall be maintained and define the process employed for their calibration including details of equipment type, unique identification, location, frequency of checks, check method, range to be checked, number of points over the range to be checked (3 minimum, unless otherwise stated) and acceptance criteria / accuracy required. These calibration details and any governing specification(s) must also be flowed down to any external calibration source either by including the information directly on a P.O. with the calibration system requirements (e.g. ANSI/NCSL Z540 or ISO 10012) or by referencing a document on the P.O. with these requirements that goes with the P.O. to the calibration source.

Storage requirements, including periodic preservation/condition checks, shall be established for production equipment or tooling in storage.

The organization shall establish processes to ensure that monitoring and measurement can be carried out and are carried out in a manner that is consistent with the monitoring and measurement requirements. The organization shall ensure that environmental conditions are suitable for the calibrations, inspections, measurements and tests being carried out.
Where necessary to ensure valid results, measuring equipment shall
  1. be calibrated or verified at specified intervals, or prior to use, against measurement standards traceable to international or national measurement standards; where no such standards exist, the basis used for calibration or verification shall be recorded;
  2. be adjusted or re-adjusted as necessary;
  3. be identified to enable the calibration status to be determined;
  4. be safeguarded from adjustments that would invalidate the measurement result;
  5. be protected from damage and deterioration during handling, maintenance and storage;
  6. be recalled to a defined method when requiring calibration.
In addition, the organization shall assess and record the validity of the previous measuring results when the equipment is found not to conform to requirements. The organization shall take appropriate action on the equipment and any product affected. Records of the results of calibration and verification shall be maintained.

When used in the monitoring and measurement of specified requirements, the ability of computer software to satisfy the intended application shall be confirmed. This shall be undertaken prior to initial use and reconfirmed as necessary.
NOTE: See ISO 10012-1 and ISO 10012-2 for guidance.

Calibration Reports

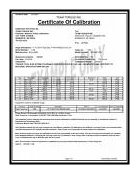
In accordance with ANSI/NCSL Z540, each certificate or report of calibration shall include the following as a minimum:

  1. A title, e.g. “Calibration Report” or “Calibration Certificate”
  2. Name and address of laboratory, and location where the calibration was carried out if different from the address of the laboratory;
  3. Unique identification of the certificate or report (such as serial number) and of each page, and total number of pages;
  4. Name and address of customer, where appropriate;
  5. Description and unambiguous identification of the item calibrated;
  6. Characterization and condition of the calibrated item (This is where the report usually notes the condition as received (e.g. unit received broken or out-of tolerance) and after calibration;
  7. Date(s) of performance of calibration, where appropriate;
  8. Identification of the calibration procedure used, or unambiguous description of any non-standard method used (This should also include identifying the calibration system specification(s) used);
  9. Reference to sampling procedure, where relevant;
  10. Any deviation from, additions to or exclusions from the calibration methods, and any other information relevant to a specific calibration, such as environmental conditions;
  11. Measurements, examinations and derived results, supported by tables, graphs, sketches and photographs, as appropriate, and any failures identified.  (Note: You should also cover in your P.O. requirements to notify you immediately, if a calibrated item is received broken or out-of-tolerance so an investigation can be initiated to determine if there is product impact. The calibration source, under ANSI/NCSL Z540, is required to notify you, but may not be aware of it.)
  12. A statement of the estimated uncertainty of the calibration results (where relevant)
  13. A signature and title, or an equivalent identification of the person(s) accepting responsibility for the content of the certificate or report (however produced), and date of the issue;
  14. Where relevant, a statement to the effect that the results relate only to the items calibrated;
  15. A statement that the certification or report shall not be reproduced except in full, without the written approval of the laboratory;
  16. Special limitations of use; and
  17. Traceability statement
  18. ISO 10012 also requires the calibration / verification frequency and the accuracy requirements be noted on a report.
Where the certificate or report contains results of calibrations performed by sub-contractors, these results shall be clearly identified.  (Note: You need to know if the place you are sending items to for calibration is the calibration source, or if they are sub-contracting out the calibration to another source.  This may affect your source approvals.  If your calibration source sub-contracts out your calibration they are suppose to notify you of their intent, in accordance with ANSI/NCSL Z540.)

Calibration reports shall be reviewed upon receipt by an individual who can determine the adequacy of the report and the review must be documented in some way.  Usually there is a name, signature or stamp and date placed on the certificate indicating review.  Whoever, you have reviewing these; make sure they do a good thorough review.  I often find out-of-tolerance reported and find out no other review was done to determine possible product impact.  If you have to do an investigation for an OOT condition, make sure you document the investigation and at least attach a copy of the investigation and results to the calibration report.

Extension of Calibrations

If you intend to extend the frequency of a calibration, be sure your governing specifications allow it.  The calibration procedure must address the criteria to either extend or reduce the calibration frequency for the specific equipment. The Nadcap baseline handbook has established, when permitted, that a decrease in a calibration frequency can be done only when four (4) consecutive acceptable calibrations and adequate documentation is available to support the extension.

Measuring Devices and Calibrations

There are some pieces of equipment that may not require a full blown calibration after initial calibration.  Items such as reticules for eye loupes, measuring templates, steel rules or scales are non-variable.  For item like this, you do need an initial calibration and certification, then subsequently and verification of the condition of the item is performed. This is normally done on an annual basis.  What is looked for is wearing away of the incremental markings, or other damage that would render the item unusable.  Of course, the technician should be watching out for this each time he or she uses the item, but an annual verification is documented. It is IMPORTANT to remember, you must keep the original calibration certificate on file and available for audit review by your customer or their representatives.


About Us | Privacy Policy | Contact Us | ©2014 Fisher Technical Services, LLC